Stop Paying for Takeout With Meal Prep Ideas
— 6 min read

I spend 2 hours each weekend prepping meals, and I’ve seen my takeout spend drop dramatically.
When I first tried to curb the habit of ordering in, the key was to treat meal prep like a short-term project rather than a chore. By carving out a focused two-hour window, I can map out, cook, portion, and store a whole week’s worth of dishes that are both affordable and nutritious.
Why Meal Prep Beats Takeout
In my experience, the biggest driver behind the switch from takeout to home-cooked meals is cost control. A single pizza night can easily run $15-$20, while a week’s worth of balanced meals prepared in bulk often stays under $50. That’s a tangible saving, especially for families juggling school lunches and work schedules.
But money isn’t the only factor. Health experts warn that frequent takeout is linked to higher sodium and saturated fat intake. As Dr. Lina Patel, a nutritionist at the Center for Healthy Eating, tells me, “When you control the ingredients, you control the nutrition profile.” She adds that homemade meals let you tailor portions to individual needs, which is crucial for kids’ growth and adults’ weight management.
On the other side of the debate, some restaurateurs argue that takeout fulfills a social need - providing variety and convenience that home kitchens can’t match. “People love the excitement of trying new flavors without the effort,” says Marco Ruiz, founder of UrbanBite Delivery. He notes that for occasional indulgence, takeout still has a place.
Balancing those perspectives, I’ve found that a well-planned prep routine preserves the novelty of meals while keeping the budget in check. By rotating proteins, veggies, and grains, the weekly menu feels fresh, and the occasional treat from a local eatery becomes a reward rather than a default.
To illustrate the shift, consider the 1950s sitcom “Bachelor Father,” which portrayed a single dad juggling work and cooking for his niece Kelly. The show aired on CBS in September 1957 before moving networks, reflecting early American attempts at single-parent budgeting (Wikipedia). Fast forward, and we now have dehydrated dinner kits like Dee Dee’s Dehydrated Dinners - just drop a bag into boiling water for a full meal (Wikipedia). The evolution underscores how convenience solutions have always existed; today’s meal prep simply builds on that legacy with healthier, more affordable options.
Planning Your 7-Day Menu in Two Hours
When I sit down on Saturday morning, I start with a simple spreadsheet that outlines breakfast, lunch, dinner, and two snack slots for each day. I keep the list to five core components: a protein, a grain or starch, a vegetable, a sauce or seasoning, and a quick-cook side. This framework reduces decision fatigue and aligns with budget cooking principles.
Industry voices echo this approach. Chef Maria Torres, founder of FreshPrep, says, “A modular menu lets you swap ingredients without rewriting the entire plan.” She emphasizes using pantry staples - canned beans, frozen peas, and dry quinoa - to stretch dollars further.
Conversely, budget-conscious blogger Jamal Lee cautions, “Over-planning can lead to waste if you misjudge portion sizes.” He recommends a “flex day” where leftovers are repurposed into a stir-fry or soup, minimizing spoilage.
My process looks like this:
- Review the family’s schedule to identify quick-grab meals on busy days.
- Select two proteins that can be cooked together (e.g., baked chicken thighs and roasted chickpeas).
- Choose a grain that cooks in under 20 minutes, such as brown rice or couscous.
- Pick three versatile vegetables - broccoli, carrots, and bell peppers - that can be roasted, steamed, or sautéed.
- Draft a simple sauce - like a lemon-garlic vinaigrette - that works across multiple dishes.
By the end of the two-hour window, I have a clear visual map of each day’s plate, which guides the batch cooking phase.
Batch Cooking Techniques for Budget and Health
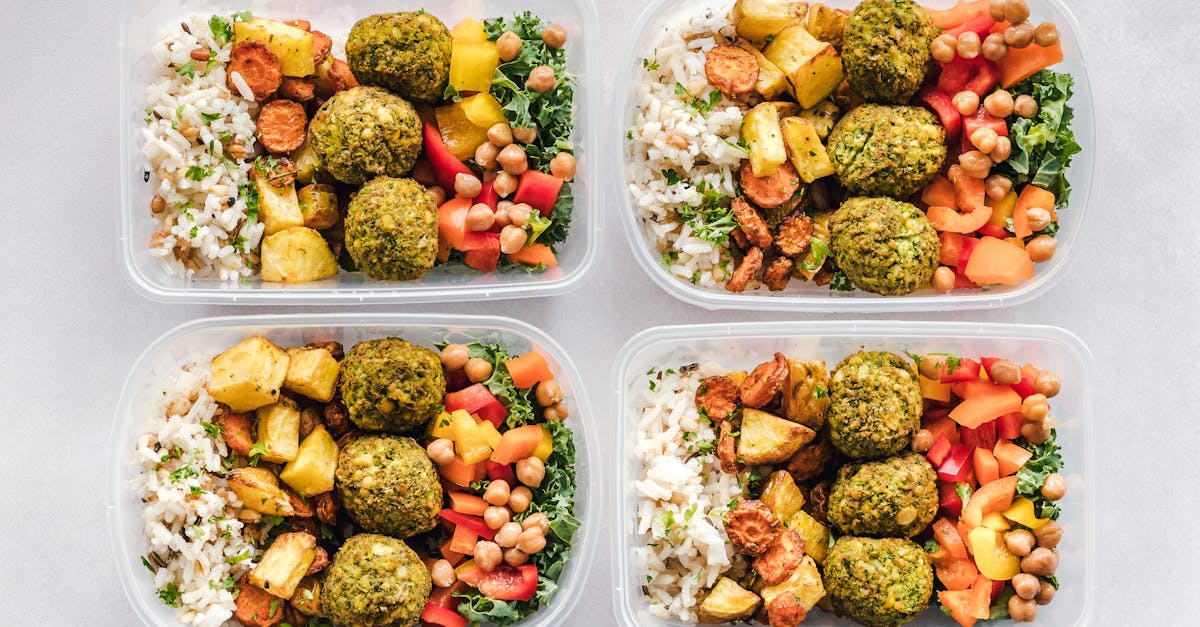
Once the menu is set, I move to the stove and oven, applying batch-cooking methods that preserve nutrients and keep costs low. One technique I swear by is the “one-pan roast.” I line a sheet pan with chicken thighs, seasoned chickpeas, and a mix of chopped vegetables, drizzle everything with olive oil, and roast at 425°F for 30 minutes. This single-pan method reduces energy usage and eliminates multiple pots and pans, saving time and cleaning effort.
Chef Anita Gomez, culinary director at GreenBite Foods, adds, “Roasting consolidates flavors; the caramelized edges give you that takeout-like taste without the extra cost.” She recommends rotating spices - smoked paprika one week, curry powder the next - to keep the palate engaged.
From a health standpoint, I favor steaming greens after the roast finishes, preserving the bright color and crunch that many takeout salads lack. A quick blanch of broccoli in boiling water for two minutes, followed by an ice-water shock, locks in vitamins.
For families on a tight budget, incorporating plant-based proteins is a smart move. According to a recent trend report on meal prep at grocery stores, ready-made dinner bundles are becoming popular, but “homemade lentil stew” still outperforms them in cost per serving (Recent: Meal prep without the prep work). I often cook a large pot of lentils with onions, garlic, and diced tomatoes - ingredients that cost under $5 total - and portion it for lunches.
Another tip: make a big batch of quinoa or brown rice early in the week, then use it as a base for bowls, stir-fries, or as a side for soup. This grain-first strategy mirrors the “make-ahead” mindset that has been trending in grocery stores, where families purchase bulk trays for convenience (Recent: 8 Meal Prep Ideas for Working from Home).
Portioning, Storing, and Reheating Without Waste
After cooking, I transition to portioning. I rely on a set of BPA-free glass containers in 16-oz, 32-oz, and family-size 64-oz sizes. According to the Food Safety Authority, glass containers retain heat better and avoid chemical leaching, making them ideal for reheating meals multiple times.
Nutritionist Dr. Patel notes, “Proper portion control prevents overeating and extends the lifespan of each prepared meal.” She advises labeling each container with the date and a brief description, a habit I picked up from my time watching “Bachelor Father,” where the single dad kept a handwritten menu for his niece.
On the flip side, some home cooks argue that plastic containers are lighter and fit better in small refrigerators. “If you’re short on space, high-quality reusable plastic can be a practical compromise,” says packaging specialist Kevin Zhou from EcoPack Solutions.
To aid decision-making, here’s a quick comparison:
| Container Type | Heat Retention | Durability | Environmental Impact |
|---|---|---|---|
| Glass | High | Very High | Low (recyclable) |
| Plastic (BPA-free) | Medium | High | Medium (recyclable if labeled) |
| Silicone | Low-Medium | High | Low (long lifespan) |
When it comes to reheating, I use the microwave for quick lunches, but I reserve the oven for dinner portions to retain crispness. A 20-minute bake at 350°F revives roasted veggies perfectly, a trick I learned while experimenting with Dee Dee’s Dehydrated Dinners - adding a brief oven finish gives them a home-cooked texture (Wikipedia).
Lastly, I always keep a “fresh-first” rule: the meals prepared earlier in the week are earmarked for the most perishable items, while sturdier dishes like lentil stew occupy the back of the fridge for later consumption.
Quick Add-Ons and Flavor Hacks
Even the best-planned menu can feel stagnant without flavor variety. I incorporate quick add-ons that take under five minutes, turning a basic bowl into a new experience.
- Fresh herbs - cilantro, basil, or parsley - chopped at the moment of serving.
- Simple sauces: mix Greek yogurt with sriracha for a creamy heat.
- Crunchy toppings: toasted pumpkin seeds or a drizzle of toasted sesame oil.
Chef Torres emphasizes the power of “micro-seasonings.” “A splash of citrus or a pinch of smoked salt can make reheated leftovers taste like a brand-new dish,” she says. This aligns with the trend of consumers seeking “restaurant-quality” flavors at home without the price tag.
Critics warn that over-reliance on sauces can inflate calorie counts. Nutritionist Dr. Patel counters, “A tablespoon of a well-chosen sauce adds flavor without sabotaging health goals, especially when the base meal is already balanced.”
My personal favorite hack involves a “sauce jar” I keep stocked with a few versatile bases: a garlic-ginger Asian glaze, a roasted red-pepper hummus, and a lemon-dill yogurt. When a weekday evening feels bland, I stir a spoonful into a reheated grain bowl, instantly lifting the dish.
By integrating these fast flavor boosters, I maintain the excitement of takeout while staying within a budget, completing the cycle of affordable, healthy, and satisfying family meals.
Key Takeaways
- Two-hour weekend prep cuts takeout costs.
- Modular menu reduces decision fatigue.
- One-pan roasting maximizes flavor, saves time.
- Glass containers preserve heat and health.
- Micro-seasonings keep meals exciting.
FAQ
Q: How much time should I allocate for weekend meal prep?
A: I recommend setting aside 2 hours on Saturday or Sunday. This window lets you plan, cook, portion, and store a full week’s worth of meals without feeling rushed.
Q: Can I keep pre-cooked meals safe for a whole week?
A: Yes, when stored in airtight glass containers and refrigerated at 40°F or below, most cooked meals stay fresh for 4-5 days. For longer storage, freeze portions; they remain safe for up to three months.
Q: What are budget-friendly protein options?
A: Bulk chicken thighs, canned beans, lentils, and frozen shrimp are cost-effective choices. Buying in larger quantities and portioning at home stretches dollars further.
Q: How do I prevent meals from getting boring?
A: Rotate spices, use fresh herbs, and add quick sauces or crunchy toppings. A simple flavor boost can make the same base ingredients feel brand-new.
Q: Is it worth investing in specialty containers?
A: Glass containers offer the best heat retention and safety, while BPA-free plastic is lighter. Choose based on your fridge space and reheating habits; both work well if labeled and maintained.