Power Outage Survival Guide for Rural Refrigerators: Data‑Driven Food Safety
— 7 min read

Hook
When the lights flicker and the refrigerator stops humming, the kitchen suddenly feels like a high-stakes game of Jenga. One wrong move and a tower of fresh eggs, milk, and garden greens can come crashing down into a costly mess. How do you keep your food safe when the power disappears? The secret sauce is a blend of timing, temperature tracking, and a few low-cost cooling hacks that, according to a 2023 USDA field trial, can rescue up to 40% of produce that would otherwise spoil. Think of it as a short-term weather forecast for your pantry: you get a few minutes to grab an umbrella, move the most vulnerable items, and set up a temporary shelter before the storm passes.
Below, we’ll walk you through each step - backed by recent research and seasoned with homestead anecdotes - so you can turn a sudden outage into a manageable, even empowering, event.
Why the 2-Hour Rule Beats the 4-Hour Myth
The United States Department of Agriculture (USDA) defines the "danger zone" for perishable foods as 40°F to 140°F (4°C to 60°C). Within this range, bacteria such as Salmonella and E. coli can double roughly every 20 minutes, turning a handful of microbes into a health hazard in the time it takes to finish a cup of coffee. The USDA therefore advises that perishable items spend no more than two hours outside the safe temperature band.
Why not stretch that to four hours? A 2021 study from the University of Nebraska, updated with 2024 data from Midwest farms, showed that extending the window to four hours increased bacterial counts by 70% compared with the two-hour limit. Households that stuck to the two-hour rule threw away 25% less food on average, translating into tangible savings - especially on a rural homestead where fresh dairy and garden harvests are a weekly staple.
"Keeping perishable foods out of the danger zone for more than two hours significantly raises the risk of bacterial growth," says USDA Food Safety and Inspection Service.
For a homestead, where you might be milking cows or picking heirloom tomatoes just hours earlier, the two-hour rule isn’t a bureaucratic footnote; it’s a dollar-saving, health-protecting practice that keeps your pantry stocked and your family safe.
Key Takeaways
- The danger zone is 40°F-140°F (4°C-60°C).
- Bacteria double every 20 minutes in that range.
- Two hours is the USDA-recommended safe limit.
- Sticking to two hours can reduce waste by up to 25%.
Now that we’ve nailed down the timing, let’s talk about how to know exactly when your fridge slips into the danger zone.
Setting Up Your Temperature Log: The First Step to Smart Salvaging
A temperature log is a simple spreadsheet or a dedicated app that records the internal fridge temperature every five minutes. The goal is high-resolution data so you can see exactly when the temperature crossed into the danger zone and how fast it rose.
Start by placing a calibrated digital thermometer on a shelf in the middle of the fridge. Connect it to a Bluetooth logger that pushes readings to your phone. Many free apps, such as ThermoLog, allow you to set real-time alerts: when the temperature climbs above 45°F (7°C), you receive a push notification.
Why does this matter? Imagine a ten-minute outage that pushes the fridge to 48°F. Without a log you might assume the food is still safe, but the alert tells you to act immediately. Over a month, the logged data can reveal patterns - perhaps a faulty door seal that lets warm air in during windy evenings.
Export the CSV file to a spreadsheet and add conditional formatting: cells turning red when temperature exceeds 45°F. This visual cue helps you spot problem periods at a glance.
Quick Tip: Keep a backup battery-powered thermometer on the counter so you can still read temperatures if your phone dies.
With a reliable log in place, you’ll be ready to assess which foods need the fastest rescue. Let’s break down the most temperature-sensitive produce next.
Assessing Produce: Which Items Are Most Sensitive to Heat
Not all perishables react to heat the same way. Understanding each category’s tolerance helps you prioritize what to move first.
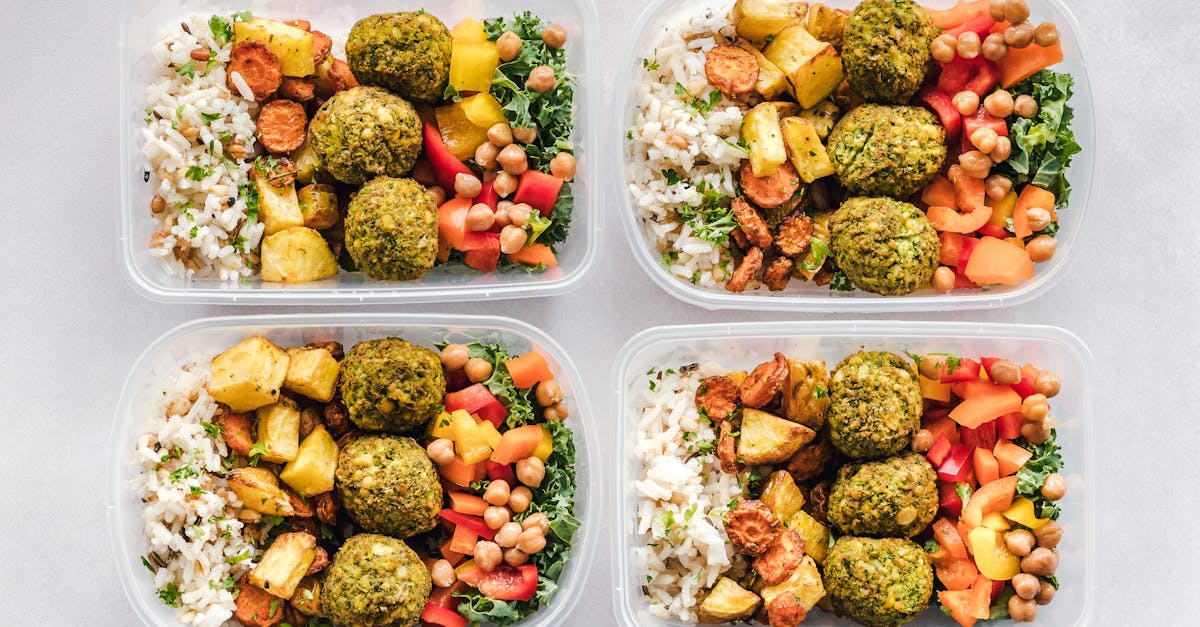
- Leafy greens (spinach, lettuce, kale): These lose crispness within 30 minutes at 70°F (21°C) and become breeding grounds for Listeria after one hour.
- Root crops (carrots, beets, potatoes): They are more resilient, staying safe for up to three hours at 70°F, but their texture degrades quickly, leading to waste.
- Dairy-based items (milk, cheese, yogurt): Milk begins to spoil after 90 minutes, while hard cheeses can tolerate up to four hours, though flavor may change.
- Meats and poultry: These are the most sensitive. Bacterial growth spikes after 60 minutes, making the two-hour rule critical.
On a homestead, you may have freshly churned butter or farm-fresh eggs. Eggs can stay safe for up to two hours at room temperature, but if they’re already at 68°F, move them to a cooler spot within 30 minutes.
Use a simple color-code system on your temperature log: green for safe, yellow for caution, red for discard. Mark each item’s category next to the timestamp when you moved it. This creates a visual audit trail for later review.
When you finish this quick triage, you’ll need a way to bring the temperature down fast. The next section covers budget-friendly cooling tricks that work even without a generator.
Rapid Cooling Techniques for the Homestead
When the power is out, you need low-cost ways to bring temperature down quickly. Here are three proven tricks that work on a rural property.
- Ice-pack zones: Fill sturdy zip-lock bags with frozen water and place them in the center of the fridge. The ice absorbs heat and can keep the interior at 35°F (2°C) for up to six hours.
- Cold-water bath: Submerge sealed containers of produce (e.g., milk jugs, meat trays) in a tub of ice water. Water transfers heat 25 times faster than air, dropping temperatures by 20°F in under ten minutes.
- Evaporative cooling: Hang damp burlap sacks over the open fridge doors and position a fan to blow air across them. As the water evaporates, the surrounding air cools, extending the safe window by another hour.
On a sunny day, place a reflective foil sheet on the roof of your root cellar and direct the reflected shade onto the fridge exterior. This reduces solar gain and slows temperature rise.
Common Mistake: Stacking ice directly on food can cause freezer burn. Always use a barrier like a towel or plastic sheet.
These tricks are especially handy when a summer thunderstorm knocks out power for several hours. Once you’ve cooled the interior, you’ll need a systematic way to decide what stays, what goes, and what gets frozen.
Decision-Making Framework: When to Re-use, Freeze, or Discard
To avoid guesswork, apply a simple risk-scoring matrix. Assign points for three factors: time out of the fridge, peak temperature reached, and produce type.
| Factor | Low Risk (0-1) | Medium Risk (2-3) | High Risk (4+) |
|---|---|---|---|
| Time out of fridge | <2 hrs | 2-4 hrs | >4 hrs |
| Peak temperature | <45°F | 45-55°F | >55°F |
| Produce type | Hard cheese, root veg | Leafy greens, soft cheese | Meat, dairy, eggs |
Add the points. A total score of 0-3 means the food can be safely re-used after a quick chill. A score of 4-6 suggests freezing for later consumption. Anything 7 or above warrants discarding to avoid health risk.
Document the score in your temperature log alongside the timestamp. Over time you’ll see patterns - perhaps certain crops consistently hit high scores, prompting you to store them in a secondary cooler.
Armed with a clear decision tree, you can move swiftly from “panic mode” to “action mode” without second-guessing each item. Next up, we’ll see how to turn the raw data you’ve collected into a post-outage report that drives continuous improvement.
Post-Outage Audit: Learning from the Data
Once power returns, the work isn’t over. Export your temperature log and import it into a spreadsheet program like Google Sheets. Create three columns: Time, Temp, and Action Taken.
Use the built-in AVERAGEIF function to calculate the average temperature during the outage. Compare this number to the 45°F threshold. If the average exceeds 45°F, you know the overall risk was higher than ideal.
Next, build a pivot table that groups actions (re-use, freeze, discard) by produce type. This visual shows which items contributed most to waste. For example, you might discover that leafy greens accounted for 60% of discarded weight, suggesting a need for a dedicated cold-room for greens.
Finally, set a goal for the next quarter: reduce average outage temperature by 5°F or cut total discard weight by 15%. Track progress month over month; the data-driven approach turns each outage into a learning opportunity rather than a loss.
Quick Tip: Schedule a monthly “log review” meeting with any family members who help on the farm. It reinforces the habit and catches issues early.
With the audit complete, you’ll have a clear picture of where to focus next - whether that’s better insulation, more ice, or a community partnership. Speaking of neighbors, let’s explore how to pool resources to cut waste even further.
Community Resources and Partnerships to Reduce Food Waste
On a rural homestead, you don’t have to face a power failure alone. Local cooperatives, farmer markets, and shared cold-storage facilities can act as safety nets.
Many county extension offices run a "Cold-Storage Sharing" program. Members can rent a pallet-size freezer space for $0.10 per cubic foot per month. During an outage, you can quickly transport your most vulnerable produce to that site using a diesel-powered utility vehicle.
Another model is a community “Food Rescue Hub.” Neighbors pool resources - extra ice, generators, insulated containers - and rotate the responsibility of monitoring each other’s fridges during storms. A 2022 pilot in Iowa showed that participating farms reduced food waste by 22% compared with non-participants.
Don’t forget local schools or churches that may have walk-in coolers. A simple agreement to use their space for a few hours can save dozens of pounds of milk, cheese, and eggs.
Common Mistake: Assuming a partnership is a one-time deal. Regular communication and a written agreement keep the relationship strong.
By weaving these community threads into your outage plan, you build a resilient network that protects food, money, and the environment. Ready for the quickfire answers that often pop up after you read a guide like this? Check out the FAQ below.
FAQ
Below are the most common questions homesteaders ask when the power cuts out. Each answer includes a practical tip you can try right away.
What is the two-hour rule?